简单的介绍下VSCode插件的创建和打包发布
一、初始化项目
现成的工具可以让我们更快将项目搭建好,这里我们使用 yo 和 generator-code 来快速构建一个插件项目。
npm install -g yo generator-code使用yo来初始化项目
yo code初始化时的一些选项
yo code

     _-----_     ╭──────────────────────────╮
    |       |    │   Welcome to the Visual  │
    |--(o)--|    │   Studio Code Extension  │
   `---------´   │        generator!        │
    ( _´U`_ )    ╰──────────────────────────╯
    /___A___\   /
     |  ~  |
   __'.___.'__
 ´   `  |° ´ Y `

? What type of extension do you want to create? New Extension (TypeScript)
? What's the name of your extension?            你的插件名称
? What's the identifier of your extension?      插件的标识符,默认和插件名称一致
? What's the description of your extension?     插件的说明
? Initialize a git repository?                  初始化git仓库
? Which bundler to use? webpack                 使用webpack构建
? Which package manager to use?                 使用pnpm来管理项目
以上操作完成,一个插件项目就创建好了。
二、插件开发
1. package.json文件配置
{
  "publisher": "climbh", // 发布插件时publisher的名称
  "name": "vscode-setting-json-config",
  "displayName": "vscode-setting-json-config",
  "version": "0.0.4",
  "description": "The project initializes the.vscode/settings.json file and enters some default contents",
  "author": "climbh",
  "license": "MIT",
  "repository": {
    "type": "git",
    "url": "https://github.com/climbh/vscode-setting-json-config.git"
  },
  "categories": [
    "Other"
  ],
  "main": "./dist/extension.js",
  "icon": "logo/icon.png", // 图标(要放在根目录下)
  "files": [
    "LICENSE.md",
    "dist/*",
    "logo/*"
  ],
  "engines": {
    "vscode": "^1.93.0"
  },
  "activationEvents": [],
  "contributes": {
    "commands": [
      {
        "command": "climbh.file-nesting", // 命令名称
        "title": "配置写入",
        "category": "climbh-file-nesting"
      },
      {
        "command": "climbh.custom-config",
        "title": "配置自定义",
        "category": "climbh-custom-config"
      },
      {
        "command": "climbh.remove-config",
        "title": "自定义配置删除",
        "category": "climbh-remove-config"
      }
    ]
  },
  "scripts": {
    "build": "tsup src/extension.ts --external vscode",
    "dev": "npm run build --watch src",
    "publish": "npm run build && vsce publish --no-dependencies",
    "pack": "npm run build && vsce package --no-dependencies",
    "lint": "eslint --fix"
  },
  "devDependencies": {
    "@antfu/eslint-config": "^3.7.1",
    "@types/eslint": "^9.6.1",
    "@types/mocha": "^10.0.7",
    "@types/node": "20.x",
    "@types/vscode": "^1.93.0",
    "@typescript-eslint/eslint-plugin": "^8.3.0",
    "@typescript-eslint/parser": "^8.3.0",
    "@vscode/test-cli": "^0.0.10",
    "@vscode/test-electron": "^2.4.1",
    "@vscode/vsce": "^3.1.0",
    "eslint": "^9.11.0",
    "ts-loader": "^9.5.1",
    "tsup": "^8.3.0",
    "typescript": "^5.5.4",
    "webpack": "^5.94.0",
    "webpack-cli": "^5.1.4"
  }
}
2. 插件入口文件
插件入口文件是 src/extension.ts,我们先来创建一个配置写入的命令,然后在插件启动时调用这个命令。
import * as vscode from 'vscode'
import type { ExtensionContext, WorkspaceConfiguration } from 'vscode'

// 插件激活时的处理
export function activate(context: ExtensionContext) {
  // 创建一个命令
  const command = vscode.commands.registerCommand('climbh.file-nesting', () => {
    vscode.window.showInformationMessage('插件启动成功')
  })

  // 将命令添加到插件上下文
  context.subscriptions.push(command)
}

// 插件停用时的处理
export function deactivate() {}
插件启动时,会调用 activate 函数,在这个函数中,我们注册了一个命令,当用户点击这个命令时,会调用 vscode.window.showInformationMessage 显示一个信息框。
3.插件调用
在运行与调试中点击运行,此时会打开一个新的vscode窗口来进行插件的调试。
因为我使用的是mac,所以使用cmd + shift + p 调用命令窗口, 然后输入climbh.file-nesting, 就可以调用这个命令了。vscode右下角就会出现一个显示“插件启动成功”的提示框。

package.json中注册的命令,就会在cmd + shift + p 调用命令窗口中调用,所以定义了命令就一定要进行实现。否则就不要定义命令,以免使用时报错。
三、插件的发布
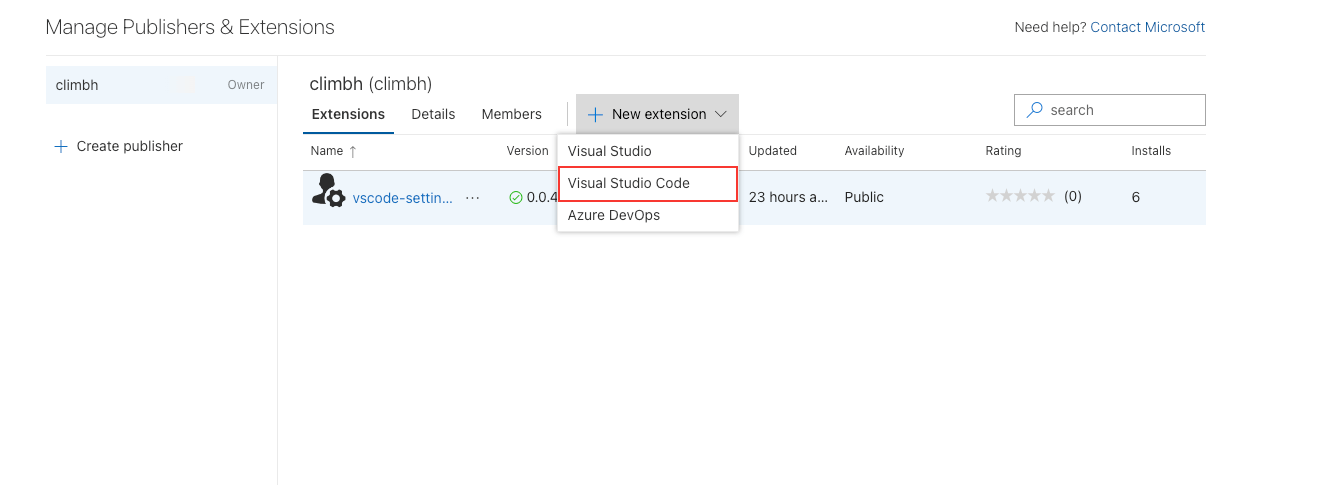
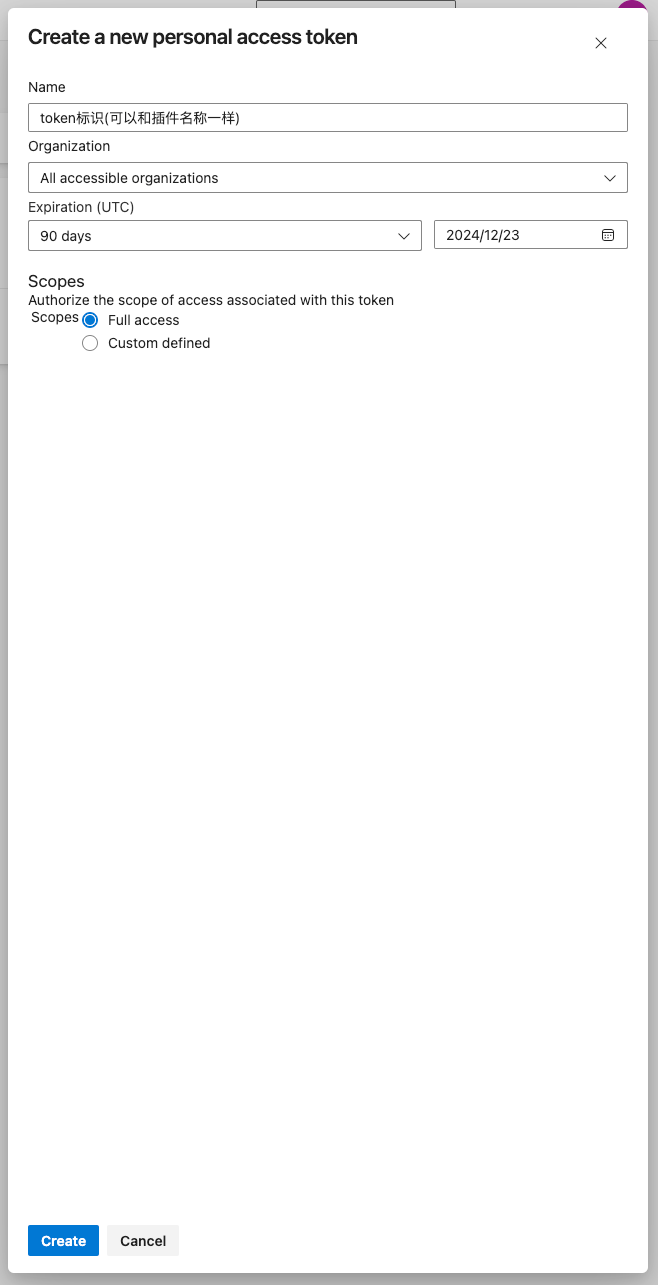
1.Azure DevOps 在该网址注册一个账号,发布插件需要用到该账号生成一个token。
注册成功后,在左侧菜单中选择个人设置,找到个人设置,点击生成token,生成一个token。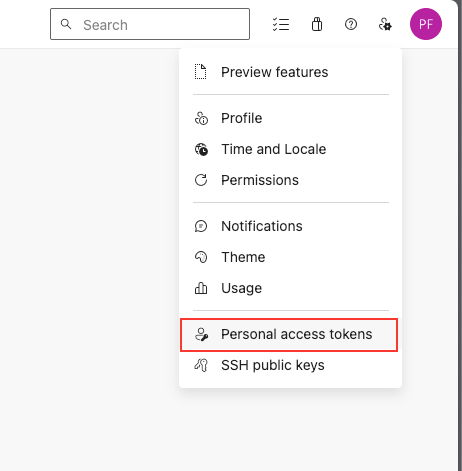
插件的发布使用到了 vsce 这个工具,这个工具可以打包插件,并发布到vscode的插件市场。
2.Create Publisher 点击创建一个发布者账号
插件的发布需要用到发布者账号,发布者账号是插件的发布者。 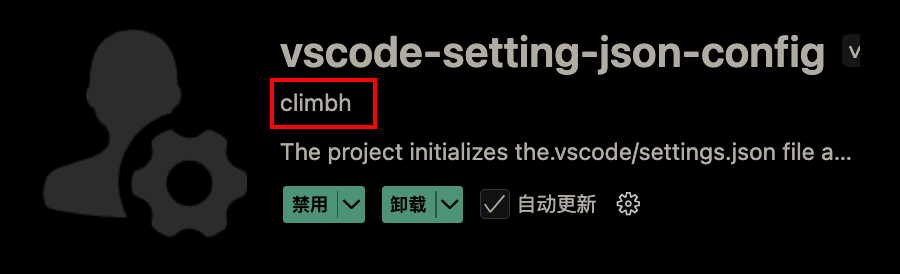
3.插件的打包与发布
打包和发布需要用到 vsce 这个工具,这个工具可以打包插件,并发布到vscode的插件市场。
安装
npm install -g @vscode/vscepackage.json中需要配置 publisher,值为发布者账号名称。这一步是必须的,否则会在打包和发布时报错。
- 登录发布者并绑定token
- 执行 vsce login <publisher> 命令后会提示你输入token。
- 打包本地 VSIX 包
- 执行 vsce package 命令打包插件。
- 发布插件
- 执行 vsce publish 命令发布插件。
- 也可以执行 vsce publish --no-dependencies 命令发布插件,不发布依赖包。
- 还可以直接在登录发布者后,直接上传打包出来的VSIX文件。